Come esportare tutte le immagini da Excel in un colpo solo?
Supponiamo che tu abbia molte immagini nella tua cartella di lavoro e desideri salvarle in una cartella specifica contemporaneamente. Di solito, puoi copiare e incollare le immagini una per una manualmente per salvarle, ma è dispendioso in termini di tempo ripetere continuamente questa operazione. Qui ti presenterò alcuni suggerimenti per risolvere questo compito.
Esporta tutte le immagini contemporaneamente da Excel con la funzione Salva con nome
Grazie alla funzione integrata di Excel Salva con nome, puoi salvare una cartella di lavoro come Pagina Web per conservare tutte le immagini — inclusi grafici, forme e altri oggetti — in una cartella. Ecco come fare.
1. Apri la cartella di lavoro contenente le immagini che desideri salvare. Fai clic su File > Salva con nome > Sfoglia.

2. Nella finestra di dialogo Salva con nome, devi:

3. Nella finestra di dialogo Microsoft Excel visualizzata, fai clic sul pulsante Sì.

4. Apri la cartella in cui sono stati salvati i file esportati e troverai una sottocartella e un file HTML denominato “Elenco file”. Tutte le immagini presenti nella cartella di lavoro, inclusi grafici, forme e altri oggetti, sono state salvate in questa sottocartella.

5. Puoi conservare nella cartella solo le immagini che ti servono ed eliminare quelle superflue.
Esporta facilmente tutte le immagini contemporaneamente da Excel con uno strumento sorprendente
Il metodo precedente estrae tutti gli oggetti dalla cartella di lavoro, ma potresti non averne bisogno di tutti. Se hai installato Kutools per Excel in Excel, la sua funzionalità Esporta grafico ti permette di salvare solo le immagini che ti servono.
1. Fai clic su KUTOOLS PLUS > Importa/Esporta > Esporta grafico:

2. Nella finestra di dialogo Esporta grafico, procedi come segue:
 per Seleziona una cartella in cui salvare le immagini esportate;
3. Verrà visualizzata una finestra di dialogo che indica quante immagini sono state esportate con successo; fai clic sul pulsante OK.
Ora puoi recarti nella cartella di destinazione e controllare i file Esporta Immagini.
Fai clic su Esporta grafico per saperne di più su questa funzionalità.
Prima di applicare Kutools per Excel, la preghiamo di scaricarlo e installarlo innanzitutto.
Esporta Immagini e rinominarle con i valori delle celle adiacenti
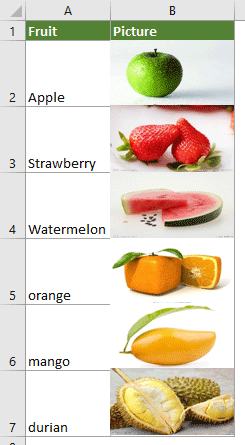
Come mostrato nello screenshot seguente, ci sono due colonne: una contiene un elenco di nomi di frutta e l’altra le relative immagini. Per esportare queste immagini e assegnare loro automaticamente i nomi corrispondenti della frutta, puoi provare il codice VBA descritto in questa sezione.
1. Nel foglio di lavoro da cui desideri esportare le immagini, premi i tasti Alt+F11 per aprire la finestra di Microsoft Visual Basic, Applications.
2. Nella finestra di Microsoft Visual Basic, Applications, fai clic su Inserisci > Modulo. Quindi, copia il seguente codice VBA nella finestra del modulo.
Codice VBA: Esporta le immagini da una colonna e assegna loro automaticamente un nome
Sub ExportImages_ExtendOffice()
'Updated by Extendoffice 20220308
    Dim xStrPath As String
    Dim xStrImgName As String
    Dim xImg As Shape
    Dim xObjChar As ChartObject
    Dim xFD As FileDialog
    Set xFD = Application.FileDialog(msoFileDialogFolderPicker)
    xFD.Title = "Please select a folder to save the pictures" & " - ExtendOffice"
    If xFD.Show = -1 Then
       xStrPath = xFD.SelectedItems.Item(1) & "\"
    Else
        Exit Sub
    End If

    On Error Resume Next
    For Each xImg In ActiveSheet.Shapes
        If xImg.TopLeftCell.Column = 2 Then
        xStrImgName = xImg.TopLeftCell.Offset(0, -1).Value
        If xStrImgName <> "" Then
            xImg.Select

            Selection.Copy
            Set xObjChar = ActiveSheet.ChartObjects.Add(0, 0, xImg.Width, xImg.Height)
            With xObjChar
                .Border.LineStyle = xlLineStyleNone
                .Activate
                ActiveChart.Paste
                .Chart.Export xStrPath & xStrImgName & ".png"
                .Delete
            End With
        End If
        End If
    Next
End Sub
Note:
3. Premi il tasto F5 per eseguire il codice. Nella finestra visualizzata, seleziona una cartella in cui salvare le immagini, quindi fai clic su OK.

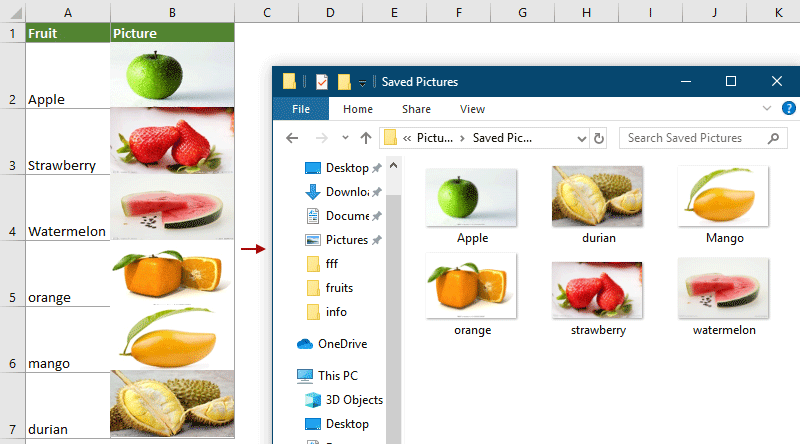
Tutte le immagini nella colonna specificata verranno esportate e rinominate automaticamente in base ai valori delle celle adiacenti, come indicato.
Articolo correlato:
Come esportare grafici come immagini in Excel?
Migliori Strumenti per la Produttività in Office
Potenzia le tue competenze in Excel con Kutools per Excel e sperimenta un’efficienza mai vista prima.Kutools per Excel offre oltre 300 funzionalità avanzate per aumentare la produttività e Risparmia tempo.Clicca qui per ottenere la funzionalità di cui hai più bisogno...
Office Tab Porta l'interfaccia a schede in Office e rende il tuo lavoro molto più semplice
- Abilita la modifica e la lettura a schede in Word, Excel, PowerPoint, Publisher, Access, Visio e Project.
- Apri e crea più documenti in nuove schede all’interno della stessa finestra, invece che in finestre separate.
- Aumenta la tua produttività del 50 % e risparmia centinaia di clic del mouse ogni giorno!
Tutti i componenti aggiuntivi di Kutools in un unico programma di installazione.
Kutools for Office è la suite che include componenti aggiuntivi per Excel, Word, Outlook e PowerPoint, oltre a Office Tab Pro: la soluzione ideale per i team che lavorano su diverse app di Office.
- Suite completa— componenti aggiuntivi per Excel, Word, Outlook e PowerPoint + Office Tab Pro
- Un unico programma di installazione, una sola licenza— configurazione in pochi minuti (pronto per MSI)
- Funziona meglio insieme— produttività ottimizzata tra le app di Office
- Prova gratuita di 30 giorni con tutte le funzionalità— nessuna registrazione, nessuna carta di credito
- Miglior rapporto qualità-prezzo— risparmia rispetto all’acquisto dei singoli componenti aggiuntivi