Come inviare un'email da un intervallo limitato di celle in Excel?
Spesso è necessario condividere dati o report importanti con altri direttamente dalla propria cartella di lavoro Excel, e includere un intervallo specifico di celle nel corpo dell'email consente di risparmiare tempo e garantire precisione. Ad esempio, inviare riepiloghi finanziari, voti degli studenti o dati di inventario via email direttamente da Excel permette ai destinatari di visualizzare immediatamente le informazioni essenziali senza dover aprire allegati. Questo articolo illustra metodi pratici per inviare un'email con un intervallo selezionato incorporato direttamente nel corpo del messaggio, semplificando la comunicazione e la condivisione dei dati da Excel.
Inviare un'email da un Intervallo limitato di celle in Excel
Inviare un'email da un Intervallo limitato di celle con uno strumento eccezionale
Altri tutorial sull'invio di email da Excel...
Inviare un'email da un Intervallo limitato di celle in Excel
Per chi preferisce un approccio integrato e personalizzabile, utilizzare il codice VBA in Excel rappresenta un metodo efficiente per copiare un intervallo di celle selezionato e incollarlo automaticamente nel corpo di un'email di Outlook. Questa soluzione è ideale per chi usa regolarmente Microsoft Outlook come client di posta elettronica e desidera automatizzare l’invio di email direttamente da Excel. Di seguito viene illustrato come procedere:
1. Apri il foglio di lavoro che contiene l'intervallo di celle da incorporare nell'email. Premi contemporaneamente Alt + F11 per avviare la finestra di Microsoft Visual Basic for Applications. Questa scorciatoia ti permette di accedere rapidamente all'editor VBA, dove inserirai il codice.
2. Nella finestra dell'editor VBA, fare clic su Strumenti > Riferimenti. Assicurati di selezionare la cartella di lavoro corretta, soprattutto se hai più file aperti.
3. Nella finestra di dialogo Riferimenti – VBAProject, scorri e seleziona l'opzione Microsoft Outlook Object Library. Abilitare questo riferimento consente a VBA di interagire con Outlook, permettendoti di creare e inviare email direttamente. Dopo aver selezionato la casella, fai clic su OK.

4. Sulla barra dei menu, fai clic su Inserisci > Modulo per aggiungere un nuovo modulo di codice. Copia quindi il seguente codice VBA e incollalo nella finestra del modulo.
Codice VBA: Inviare un'email con un Intervallo limitato in Excel
Sub Send_Email()
'Updated by Extendoffice 20200119
    Dim xRg As Range
    Dim I, J As Long
    Dim xAddress As String
    Dim xEmailBody As String
    Dim xMailOut As Outlook.MailItem
    Dim xOutApp As Outlook.Application
    On Error Resume Next
    xAddress = ActiveWindow.RangeSelection.Address
    Set xRg = Application.InputBox("Please select range you need to paste into email body", "KuTools For Excel", xAddress, , , , , 8)
If xRg Is Nothing Then Exit Sub
Application.ScreenUpdating = False
    Set xOutApp = CreateObject("Outlook.Application")
    Set xMailOut = xOutApp.CreateItem(olMailItem)
    For I = 1 To xRg.Rows.Count
        For J = 1 To xRg.Columns.Count
            xEmailBody = xEmailBody & "  " & xRg.Cells(I, J).value
        Next
        xEmailBody = xEmailBody & vbNewLine
    Next
    xEmailBody = "Hi" & vbLf & vbLf & " body of message you want to add" & vbLf & vbLf & xEmailBody & vbNewLine
    With xMailOut
        .Subject = "Test"
        .To = "happy.xuebi@163.com"
        .Body = xEmailBody
        .Display
        '.Send
    End With
    Set xMailOut = Nothing
    Set xOutApp = Nothing
    Application.ScreenUpdating = True
End Sub
Note:
- 1). È possibile personalizzare il contenuto e il saluto nella riga xEmailBody = «Hi» & vbLf & vbLf & " body of message you want to add" & vbLf & vbLf & xEmailBody & vbNewLine in base alle proprie esigenze. Ad esempio, potresti voler aggiungere un messaggio personalizzato o istruzioni specifiche prima dei dati di Excel.
- 2). Regola destinatario e oggetto modificando questa riga: .To = happy.xuebi@163.com e .Subject = «Test». Assicurati che l'indirizzo email del destinatario sia corretto per evitare problemi di recapito.
5. Per eseguire il codice, premere F5 nell'editor VBA. Quando appare la finestra di dialogo Kutools per Excel, seleziona l’intervallo di celle da includere nel corpo dell’email e fai clic su OK. Se hai selezionato l’intervallo sbagliato, puoi riavviare il processo o modificare la selezione.

6. Verrà generata automaticamente un'email di Outlook con il destinatario specificato, l'oggetto, il messaggio inserito e i dati di Excel inclusi nel corpo del messaggio. Anteprima del messaggio prima dell'invio per verificare che tutti i dati siano visualizzati correttamente. Fare clic sul pulsante Invia per inviare l'email.

Nota: Questo metodo VBA funziona solo se Microsoft Outlook è installato ed è impostato come client di posta predefinito. Se utilizzi altri programmi di posta elettronica, valuta l’alternativa descritta di seguito. Inoltre, se Outlook non è in esecuzione, la macro lo avvierà automaticamente.
Limitazioni: Richiede Outlook e le autorizzazioni appropriate per accedere alla funzionalità email. Se l'organizzazione limita l'uso delle macro o l'accesso a Outlook, questo metodo potrebbe non essere applicabile.
Inviare un'email da un Intervallo limitato di celle con uno strumento eccezionale
Per chi non utilizza Outlook o preferisce un approccio più semplice e senza codice, Kutools per Excel offre una soluzione immediata per inviare email contenenti intervalli di celle selezionati. La funzione «Invia email» di Kutools permette di configurare un server SMTP e di inviare messaggi da qualsiasi account supportato — come Gmail, Yahoo o la posta aziendale — direttamente da Excel, rendendola una scelta versatile per lavorare in ambienti diversi o condividere informazioni con più destinatari.
Per utilizzare questo metodo, seguire questi passaggi:
1. Innanzitutto, prepara un elenco email con i campi necessari.
- Suggerimenti: L’elenco email richiede almeno due righe: una per le intestazioni e una o più per i dati effettivi. Ad esempio, quando si inviano email a due persone, inserire entrambi gli indirizzi sotto l’intestazione «Email», come mostrato nell’immagine seguente.

- Se desideri creare rapidamente un elenco email, prova la funzionalità Crea elenco di invio per una configurazione automatica!

2. Successivamente, seleziona l'intervallo effettivo di Excel da incollare nel corpo del messaggio email, quindi premi Ctrl + C per copiarlo. Assicurati di copiare solo le celle necessarie per garantire chiarezza nell'email.
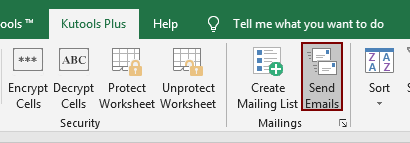
3. Seleziona l'intero elenco email (incluse le intestazioni) e vai su KUTOOLS PLUS > Invia email.
4. Verrà visualizzata la finestra di dialogo «Invia email», con i campi compilati in base all’elenco email selezionato.
- 4,1) Esamina e regola gli elementi nella finestra di dialogo in base alle tue esigenze. Puoi aggiungere ulteriori campi all’elenco email se desideri messaggi personalizzati o informazioni aggiuntive.
- 4,2) Fare clic all'interno della casella «Corpo email» e premere Ctrl + V per incollare l'intervallo copiato. Aggiungi eventuali testi o istruzioni aggiuntive, assicurandoti che il messaggio email sia chiaro e informativo.
- 4,3) Assicurarsi che «Invia utilizzando Outlook» sia deselezionata se si desidera inviare tramite SMTP (altri servizi email).
- 4,4) Fai clic su Impostazioni SMTP per configurare le impostazioni SMTP dell'account email, necessarie per inviare messaggi direttamente da account diversi da Outlook.


5. Nella finestra di dialogo «Impostazioni del server di posta (SMTP – Nuovo schema)», compila tutti i dettagli richiesti, come il tuo indirizzo email, il server SMTP, il numero della porta e le credenziali di autenticazione. Puoi anche scegliere di salvare le email inviate in una cartella specifica selezionando l’opzione «Salva email inviate in», utile per tenere traccia delle tue comunicazioni. Al termine della configurazione, fai clic su OK per confermare.

6. Si tornerà alla finestra «Invia email». Controlla attentamente tutti i campi e il contenuto incollato per assicurarti che siano corretti, quindi fai clic su Invia per inviare l'email. L'email verrà inviata tramite il server configurato direttamente da Excel e apparirà una conferma o uno stato in base all'esito dell'operazione.
Vantaggi: Kutools supporta l’invio di email da quasi tutti gli account abilitati SMTP, non solo da Outlook, risultando perfetto per chi utilizza webmail, gestisce più domini o cerca un’interfaccia intuitiva senza dover ricorrere a macro.
Quando utilizzi Kutools, verifica attentamente le impostazioni del server per evitare errori di mancata consegna. Se le email non vengono inviate, controlla la connettività di rete, l’indirizzo del server, la porta e le credenziali di accesso.
Per l’invio massivo di email, visualizza sempre l’anteprima di almeno un messaggio prima dell’invio collettivo, per individuare e correggere tempestivamente eventuali problemi di formattazione o personalizzazione.
Articoli correlati:
Invia email agli indirizzi specificati nelle celle di Excel
Supponiamo che tu abbia un elenco di indirizzi email e voglia inviare messaggi in blocco direttamente da Excel. Come fare? Questo articolo ti mostra come inviare email a più indirizzi indicati nelle celle di Excel.
Inserire la firma di Outlook quando si invia un'email da Excel
Vuoi inviare un'email direttamente da Excel e includere automaticamente la tua firma predefinita di Outlook? In questo articolo ti mostriamo due metodi efficaci per inserire la firma di Outlook durante l'invio di un'email da Excel.
Inviare un'email con più allegati da Excel
Questo articolo spiega come inviare un'email tramite Outlook con più allegati direttamente da Excel.
Inviare un'email quando la data di scadenza in Excel è soddisfatta
Ad esempio, se la data di scadenza nella colonna C è minore o uguale a 7 giorni (considerando che oggi è il 13/9/2017), invia un promemoria via email al destinatario indicato nella colonna A, utilizzando il messaggio specificato nella colonna B. Come fare? Questo articolo illustra in dettaglio un metodo VBA per gestire questa situazione.
Inviare automaticamente un'email in base al valore di una cella in Excel
Immagina di voler inviare automaticamente un'email tramite Outlook a un destinatario specifico non appena il valore di una determinata cella in Excel soddisfa una certa condizione. Ad esempio, quando il valore della cella D7 supera 200, viene generata immediatamente un’email. Questo articolo ti mostra un metodo VBA semplice e veloce per ottenere subito questo risultato.
Migliori Strumenti per la Produttività in Office
Potenzia le tue competenze in Excel con Kutools per Excel e sperimenta un’efficienza mai vista prima.Kutools per Excel offre oltre 300 funzionalità avanzate per aumentare la produttività e Risparmia tempo.Clicca qui per ottenere la funzionalità di cui hai più bisogno...
Office Tab Porta l'interfaccia a schede in Office e rende il tuo lavoro molto più semplice
- Abilita la modifica e la lettura a schede in Word, Excel, PowerPoint, Publisher, Access, Visio e Project.
- Apri e crea più documenti in nuove schede all’interno della stessa finestra, invece che in finestre separate.
- Aumenta la tua produttività del 50 % e risparmia centinaia di clic del mouse ogni giorno!
Tutti i componenti aggiuntivi di Kutools in un unico programma di installazione.
Kutools for Office è la suite che include componenti aggiuntivi per Excel, Word, Outlook e PowerPoint, oltre a Office Tab Pro: la soluzione ideale per i team che lavorano su diverse app di Office.
- Suite completa— componenti aggiuntivi per Excel, Word, Outlook e PowerPoint + Office Tab Pro
- Un unico programma di installazione, una sola licenza— configurazione in pochi minuti (pronto per MSI)
- Funziona meglio insieme— produttività ottimizzata tra le app di Office
- Prova gratuita di 30 giorni con tutte le funzionalità— nessuna registrazione, nessuna carta di credito
- Miglior rapporto qualità-prezzo— risparmia rispetto all’acquisto dei singoli componenti aggiuntivi